
Image Loader 使用
2015-08-24
在我們開發Android專案過程中
經常會遇到需要加載網路圖片的時候
網路上也非常多3rd Party Lib可以使用
這篇我選出個人認為比較好用的3個Image Loader介紹給大家
● Glide
● Picasso
● AQuery
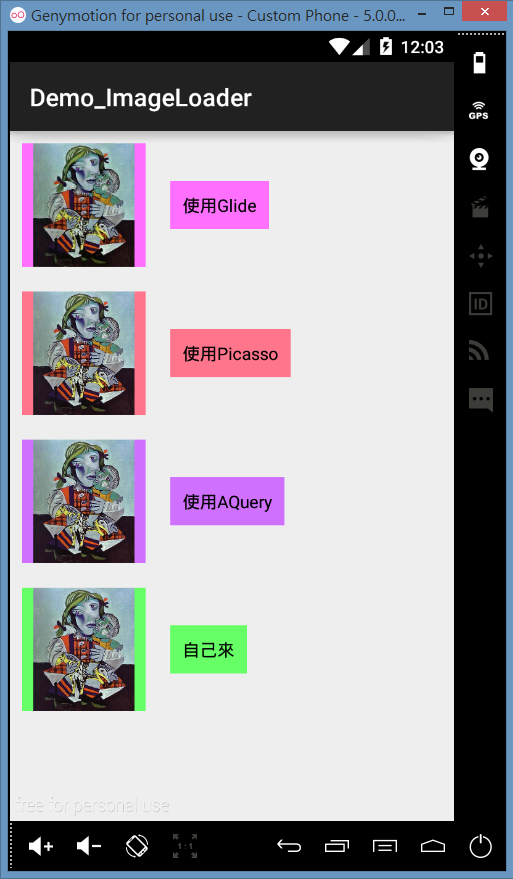
Demo專案如下圖
共有四個ImageView
分別使用Glide,Picasso,AQuery加載圖片
最後一張是自己加載
大家可以比較一下速度
1.Add Libs
打開你的gradle,引用Lib
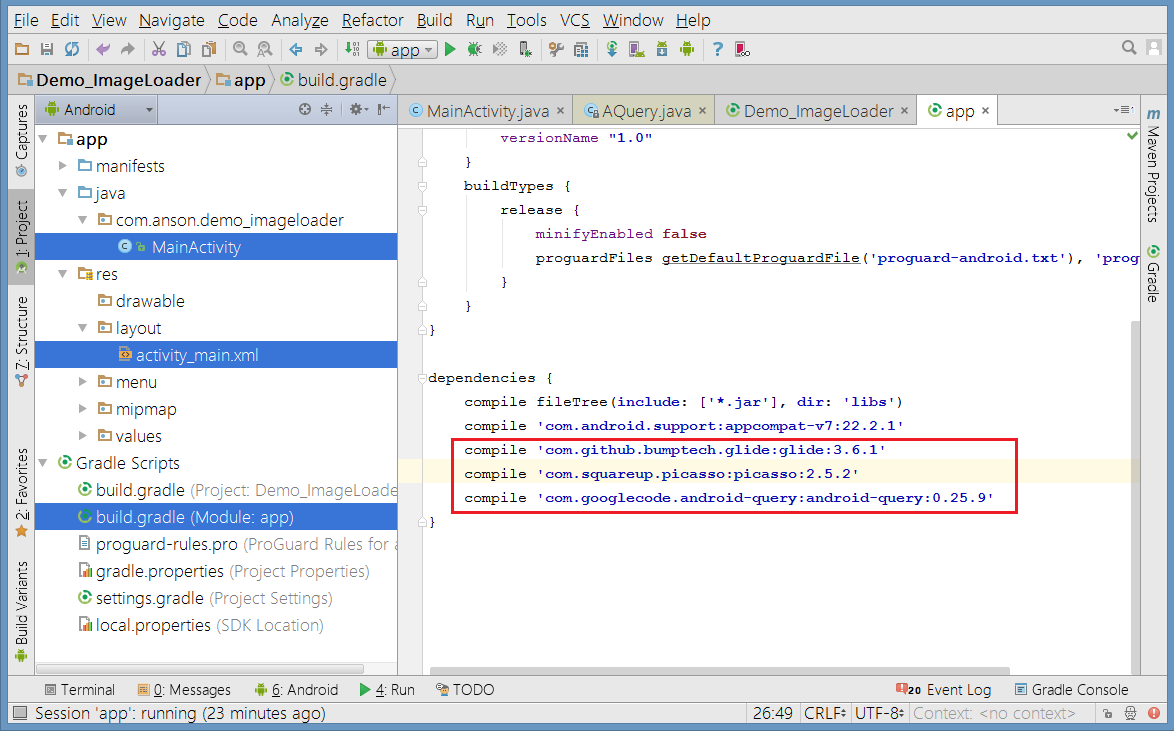
compile 'com.github.bumptech.glide:glide:3.6.1'
compile 'com.squareup.picasso:picasso:2.5.2'
compile 'com.googlecode.android-query:android-query:0.25.9'
Manifest需要加上網路權限
<uses-permission android:name="android.permission.INTERNET" />
2.Layout
很簡單..不多做解釋了
<LinearLayout xmlns:android="http://schemas.android.com/apk/res/android"
    xmlns:tools="http://schemas.android.com/tools"
    android:layout_width="match_parent"
    android:layout_height="match_parent"
    android:orientation="vertical"
    tools:context=".MainActivity">
    <LinearLayout
        android:gravity="center_vertical"
        android:orientation="horizontal"
        android:layout_width="match_parent"
        android:layout_height="wrap_content">
        <ImageView
            android:layout_margin="10dp"
            android:background="#FF70FF"
            android:layout_width="100dp"
            android:layout_height="100dp"
            android:id="@+id/imageView00" />
        <TextView
            android:padding="10dp"
            android:background="#FF70FF"
            android:textColor="@android:color/black"
            android:text="使用Glide"
            android:layout_margin="10dp"
            android:layout_width="wrap_content"
            android:layout_height="wrap_content"
            />
    </LinearLayout>
    <LinearLayout
        android:gravity="center_vertical"
        android:orientation="horizontal"
        android:layout_width="match_parent"
        android:layout_height="wrap_content">
        <ImageView
            android:layout_margin="10dp"
            android:background="#FF758C"
            android:layout_width="100dp"
            android:layout_height="100dp"
            android:id="@+id/imageView01" />
        <TextView
            android:padding="10dp"
            android:background="#FF758C"
            android:textColor="@android:color/black"
            android:text="使用Picasso"
            android:layout_margin="10dp"
            android:layout_width="wrap_content"
            android:layout_height="wrap_content"
            />
    </LinearLayout>
    <LinearLayout
        android:gravity="center_vertical"
        android:orientation="horizontal"
        android:layout_width="match_parent"
        android:layout_height="wrap_content">
        <ImageView
            android:layout_margin="10dp"
            android:background="#CF70FF"
            android:layout_width="100dp"
            android:layout_height="100dp"
            android:id="@+id/imageView02" />
        <TextView
            android:padding="10dp"
            android:background="#CF70FF"
            android:textColor="@android:color/black"
            android:text="使用AQuery"
            android:layout_margin="10dp"
            android:layout_width="wrap_content"
            android:layout_height="wrap_content"
            />
    </LinearLayout>
    <LinearLayout
        android:gravity="center_vertical"
        android:orientation="horizontal"
        android:layout_width="match_parent"
        android:layout_height="wrap_content">
        <ImageView
            android:layout_margin="10dp"
            android:background="#66FF66"
            android:layout_width="100dp"
            android:layout_height="100dp"
            android:id="@+id/imageView03" />
        <TextView
            android:padding="10dp"
            android:background="#66FF66"
            android:textColor="@android:color/black"
            android:text="自己來"
            android:layout_margin="10dp"
            android:layout_width="wrap_content"
            android:layout_height="wrap_content"
            />
    </LinearLayout>
</LinearLayout>
3.Java Code
這邊使用最簡單最常用的method來做Demo
想進一步了解,請查閱官方介紹
● Glide
● Picasso
● AQuery
public class MainActivity extends AppCompatActivity {

    private static final String IMAGE_URL = "http://i.imgur.com/DvpvklR.png";

    private ImageView mImageView00;
    private ImageView mImageView01;
    private ImageView mImageView02;
    private ImageView mImageView03;


    @Override
    protected void onCreate(Bundle savedInstanceState) {
        super.onCreate(savedInstanceState);
        setContentView(R.layout.activity_main);
        mImageView00 = (ImageView)findViewById(R.id.imageView00);
        mImageView01 = (ImageView)findViewById(R.id.imageView01);
        mImageView02 = (ImageView)findViewById(R.id.imageView02);
        mImageView03 = (ImageView)findViewById(R.id.imageView03);


        Glide.with(this)
                .load(IMAGE_URL)
                .error(android.R.drawable.stat_notify_error)
                .placeholder(android.R.drawable.ic_menu_gallery)
                .into(mImageView00);

        Picasso.with(this)
                .load(IMAGE_URL)
                .error(android.R.drawable.stat_notify_error)
                .placeholder(android.R.drawable.ic_menu_gallery)
                .into(mImageView01);

        new AQuery(this).id(mImageView02)
                .image(IMAGE_URL, true, true, 0, android.R.drawable.stat_notify_error);


        new AsyncTask<Void,Void,Bitmap>(){
            @Override
            protected Bitmap doInBackground(Void... params) {
                File file = new File(MainActivity.this.getCacheDir(),"test.jpg");
                Bitmap bitmap = loadBitmapFromUrl(IMAGE_URL, file);
                return bitmap;
            }
            @Override
            protected void onPostExecute(Bitmap bitmap) {
                mImageView03.setImageBitmap(bitmap);
                super.onPostExecute(bitmap);
            }
        }.execute();
    }


    /**下載URL上的檔案並轉成Bitmap*/
    public static Bitmap loadBitmapFromUrl(String url, File file) {
        Bitmap bitmap = null;
        try {
            URL downloadUrl = new URL(url);
            /* Open a connection to that URL. */
            URLConnection uCon = downloadUrl.openConnection();
            /*
             * Define InputStreams to read from the URLConnection.
             */
            InputStream is = uCon.getInputStream();
            BufferedInputStream bis = new BufferedInputStream(is);
            /*
             * Read bytes to the Buffer until there is nothing more to read(-1).
             */
            ByteArrayBuffer baf = new ByteArrayBuffer(5000);
            int current = 0;
            while ((current = bis.read()) != -1) {
                baf.append((byte) current);
            }
            /* Convert the Bytes read to a String. */
            FileOutputStream fos = new FileOutputStream(file);
            fos.write(baf.toByteArray());
            fos.flush();
            fos.close();
            /* Create Bitmap. */
            bitmap = BitmapFactory.decodeFile(file.getPath());
        } catch (Exception e) {
            e.printStackTrace();
        }
        return bitmap;
    }
}
4.總結
看完了Java Code我想你應該不會想要自己來load圖了!
使用這3套Lib的好處除了程式美觀外
他們都有做memory cache
各種常用功能也都有提供
而且自己load你還必須要做bitmap recycle的工作(不做你的記憶體會爆掉)
這三套lib我在專案內都有實際用過
這邊列出我的使用心得:
Load圖速度:
自己來 > AQ > Glide > Picasso
推薦度:
Glide > AQ > Picasso > 自己來
關於
安森瓦舍這個地方主要是Anson用來紀錄程式開發的相關筆記,主要分享 Android , ASP.NET MVC , HTML...等技術,如果對文章內容有疑問或是文章內容有誤,歡迎留言討論,也可以幫我按個分享,讓更多人知道這裡~